For installation, first, you have to choose your preference and then run the install command. You can start installation locally or with a cloud partner. In the below diagram, Stable shows the most currently supported and tested version of PyTorch (1.1), which is suitable for many users. If you want the latest 1.1 builds but not fully tested and supported, then you have to choose Preview (Nightly).
For installation, it’s necessary that you have met the prerequisites which are suited to your package manager. We recommend you to use Anaconda package manager because it installs all the dependencies.
| Platforms, Os, Language and other prerequisites | |||||
|---|---|---|---|---|---|
| PyTorch Build | Suitable (1.1) | Preview | |||
| Os | Linux | Mac | Windows | ||
| package | Conda | pip | LibTorch | Source | |
| language | Python 2.7 | Python 3.5 | Python 3.6 | Python 3.7 | C++ |
| Cuda | 9.0 | 10.0 | None | ||
LibTorch is available only for C++. Now, we first install PyTorch in windows with the pip package, and after that we use Conda.
Installation on Windows using Pip
To install PyTorch, you have to install python first, and then you have to follow the following steps.
Step 1:
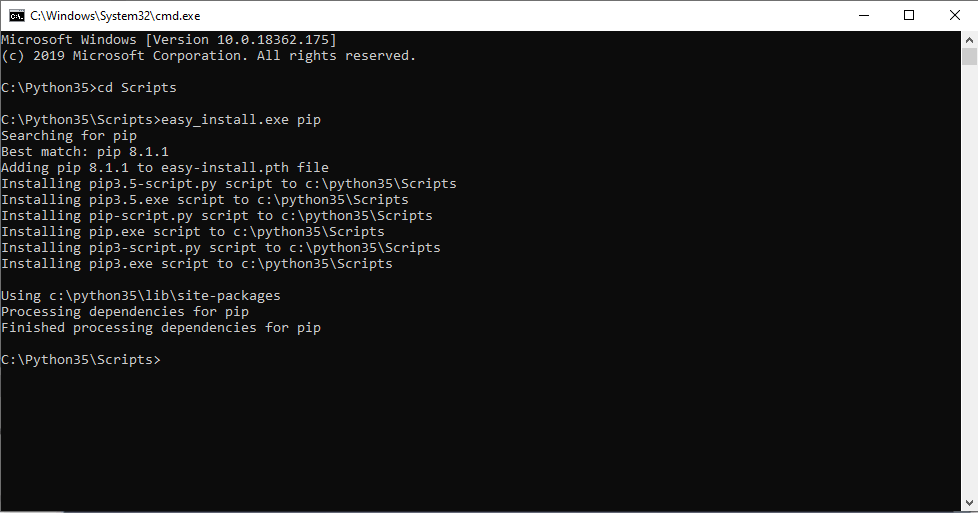
At very first you have to enter on the python37 folder and then in its Scripts folder using cd Scripts command.
Step 2:
In the second step, you have to install pip as per your required version with the help of easy_install.exe pip command on your command prompt. Once processing of dependencies is finished, you will back to the Scripts folder automatically.
Step 3:
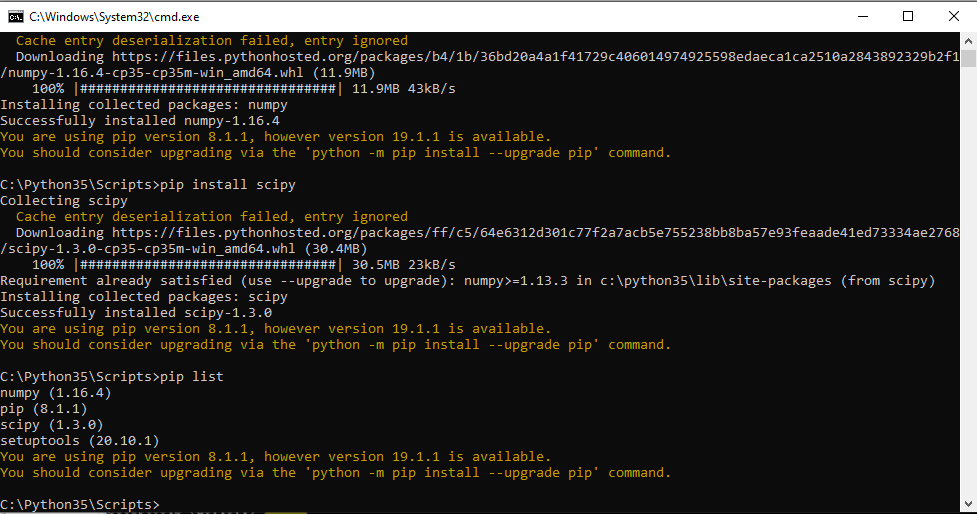
Now, your next steps is to install numpy package of python for pip. Numpy installation will be done with the help of the pip install numpy command. If your python has already this package, then it will show you “Requirement already satisfied” otherwise, it will install the package. Pip list command is used to check packages.
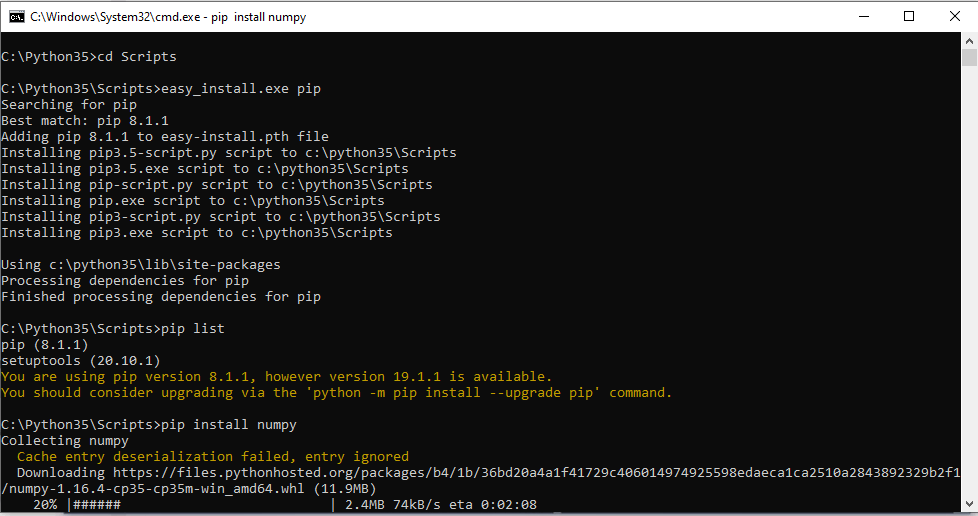
When downloading is finished, it shows a successful message and takes back your cursor in the scripts folder.
Step 4:
Next step is to install pip another package scipy with the help of pip install scipy command.
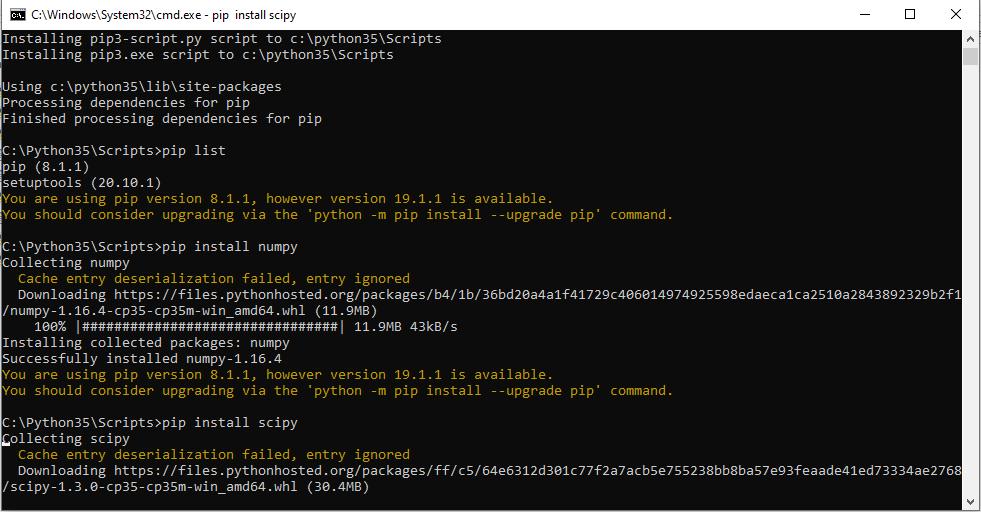
Once downloading is finished your cursor comes back in the scripts folder.
Step 5:
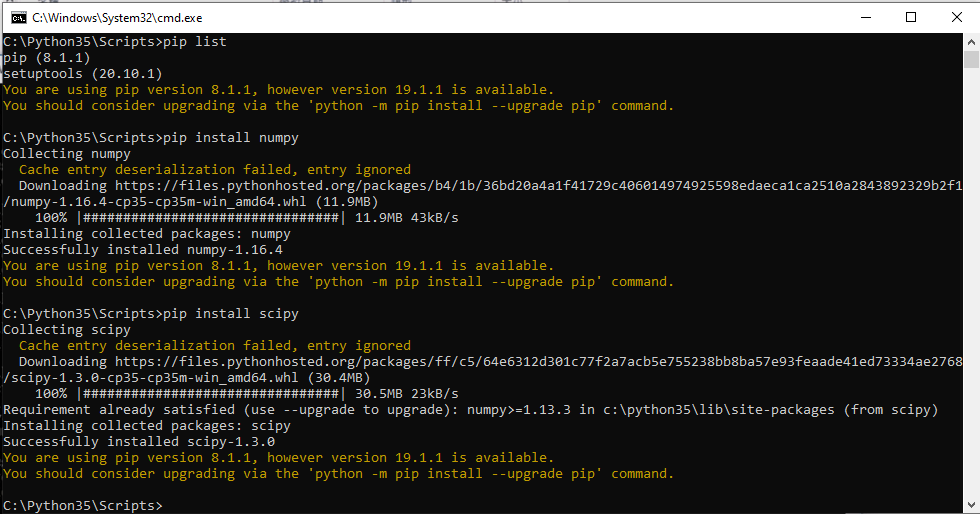
Now, check all the installed packages that are required for PyTorch using the pip list command.
Step 6
AD
Now, you have to go on https://pytorch.org/ to get the installation command of PyTorch.
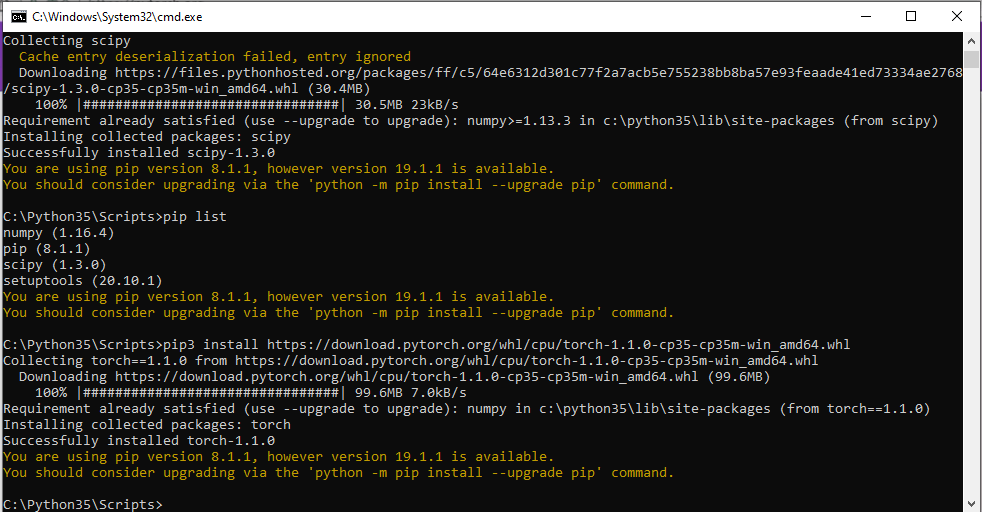
Here, you have to select your preferred PyTorch build, Operating System, Package, Language, and CUDA. It provides you two commands to install PyTorch in your windows.
Step 7:
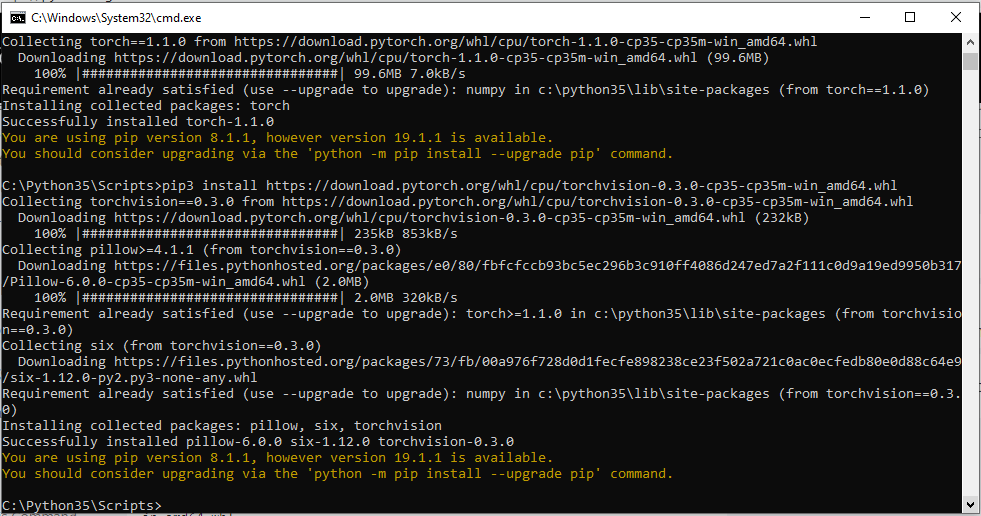
Next step is to run both the command on your command prompt. Remember if you make any changes in this command, it will not install PyTorch and give an error message.
AD
Step 8:
AD
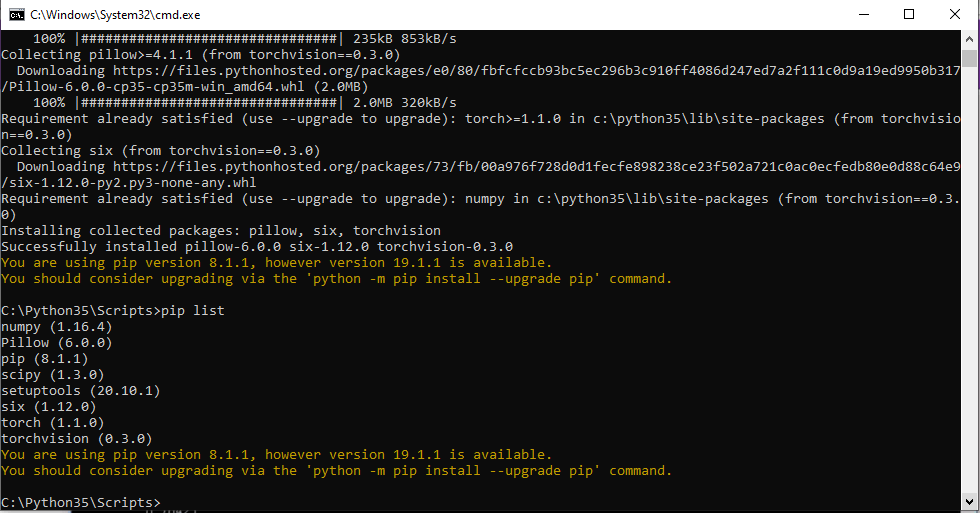
Now, rerun pip list command to check PyTorch is run successfully or not.
Step 9:
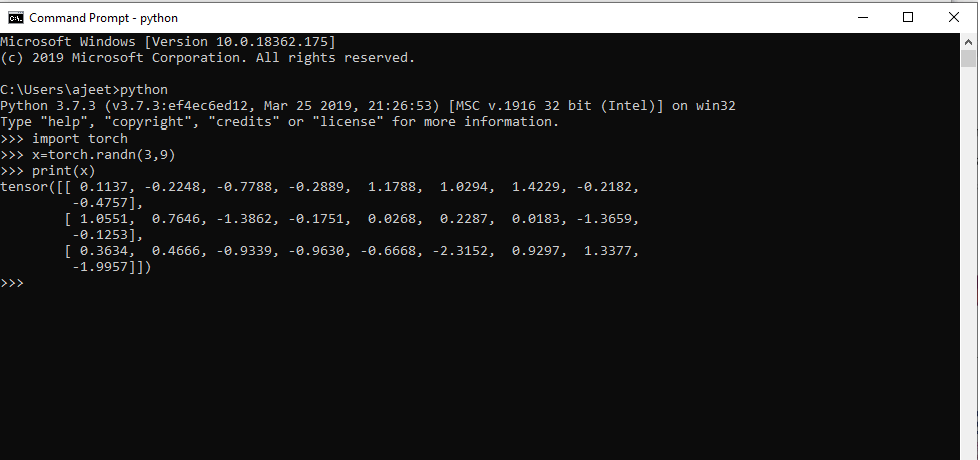
Now, test PyTorch. Run python command to work with python. Import torch to work with PyTorch and perform the operation.
Installation on Windows using Conda
This tutorial defines step by step installation of PyTorch. To install PyTorch using Conda you have to follow the following steps
Step 1:
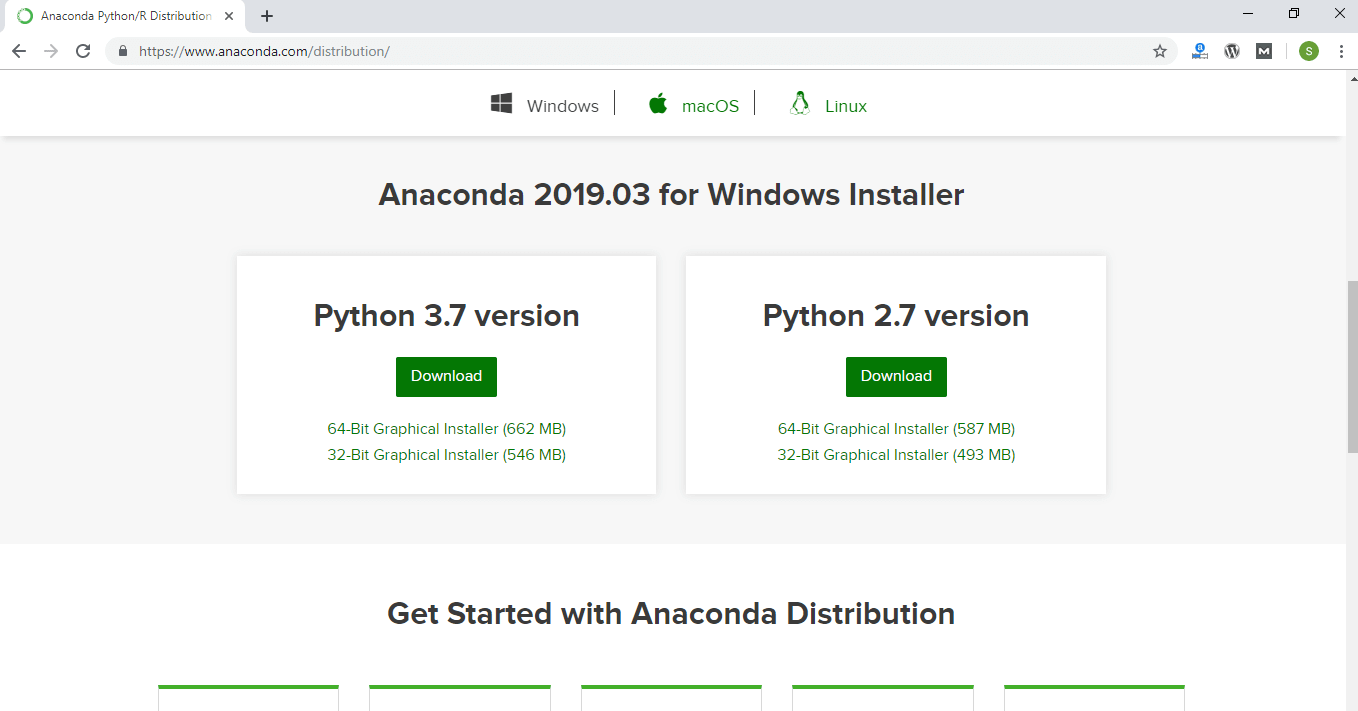
First, you have to install Anaconda’s latest version in your system. To install Anaconda, you have to go through https://www.anaconda.com/distribution/.
Step 2:
Now, run your Anaconda setup and install it completely. Once your installation of Anaconda is complete, an Anaconda command prompt appears to you.

Step 3:
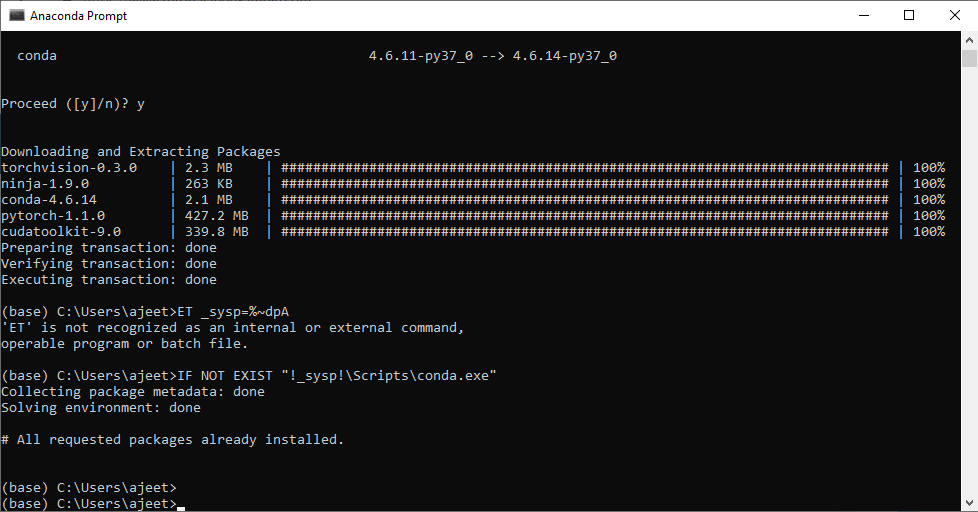
Next step is to install PyTorch using Anaconda command prompt. To install PyTorch, you have to run the installation command of PyTorch on your command prompt. This command is available on https://pytorch.org/.
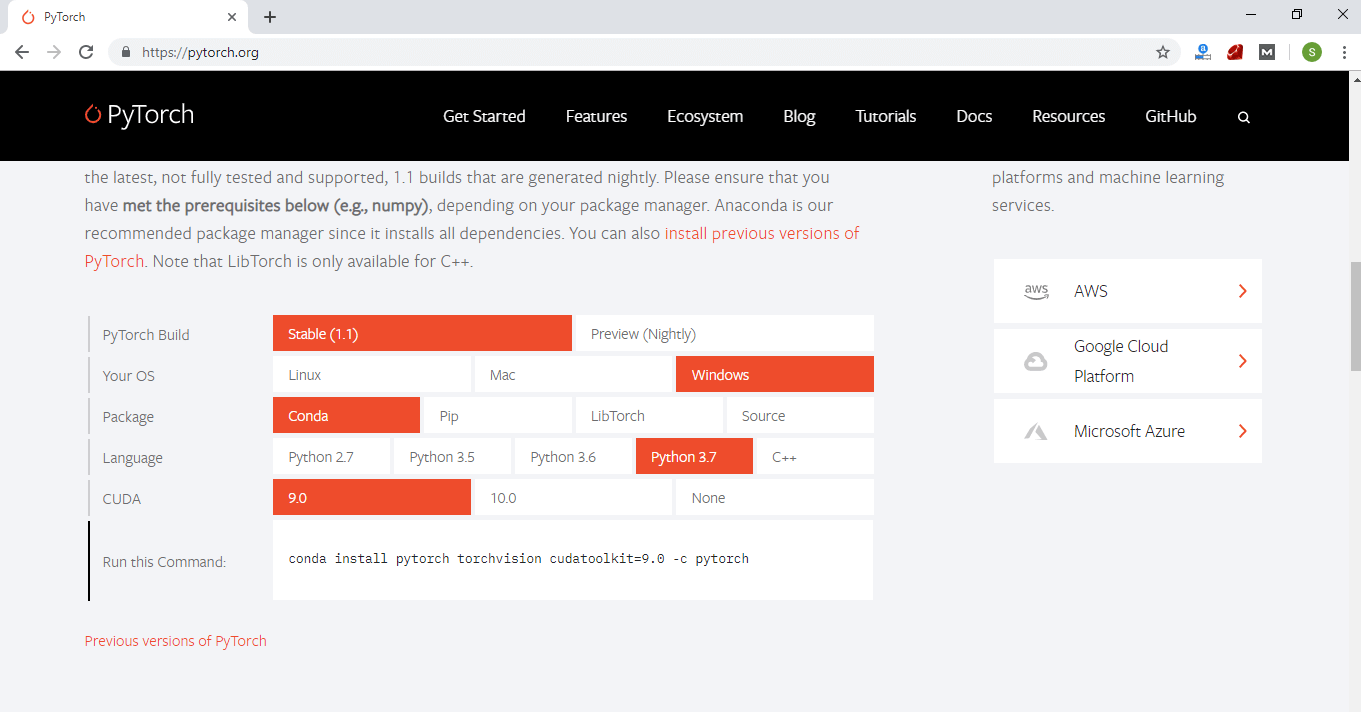
Select language and cuda version as per your requirement.
Step 4
Now, run python -version, and Conda -version command to check Conda and python packages are installed or not. After that, you run the given command in your command prompt. Remember the command which you run on command prompt is similar to the given command. If it is not similar, then it will generate error message and installation will become unsuccessful.

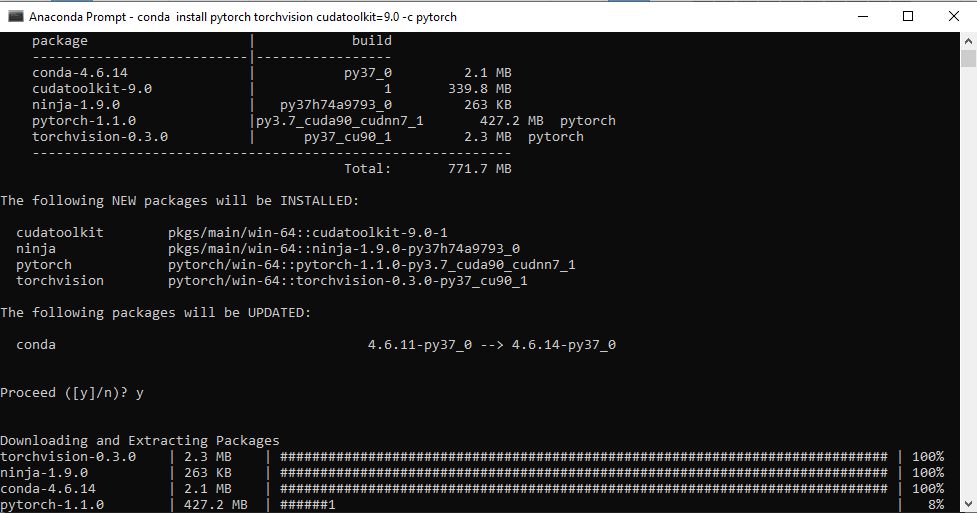
It will take some time to download and install all the packages. After completion of your command, your cursor switch to your directory’s folder.
Step 5:
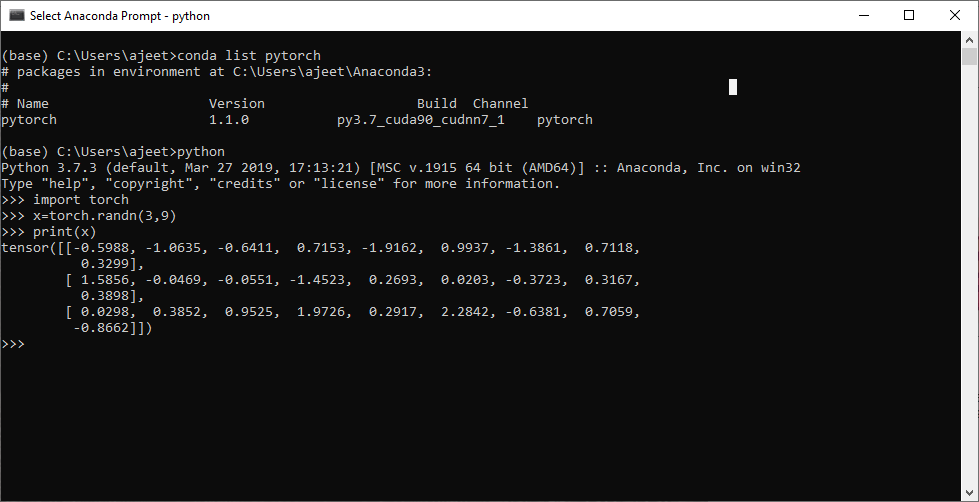
Now, perform conda list pytorch command to check all the package are installed successfully or not.

Step 6:
Now, test PyTorch. Run python command to work with python. Import torch to work with PyTorch and perform the operation.
Installation on Linux
PyTorch installation in Linux is similar to the installation of Windows using Conda. To install PyTorch in your Linux system, you have to follow the steps which are giving below.
Step 1:
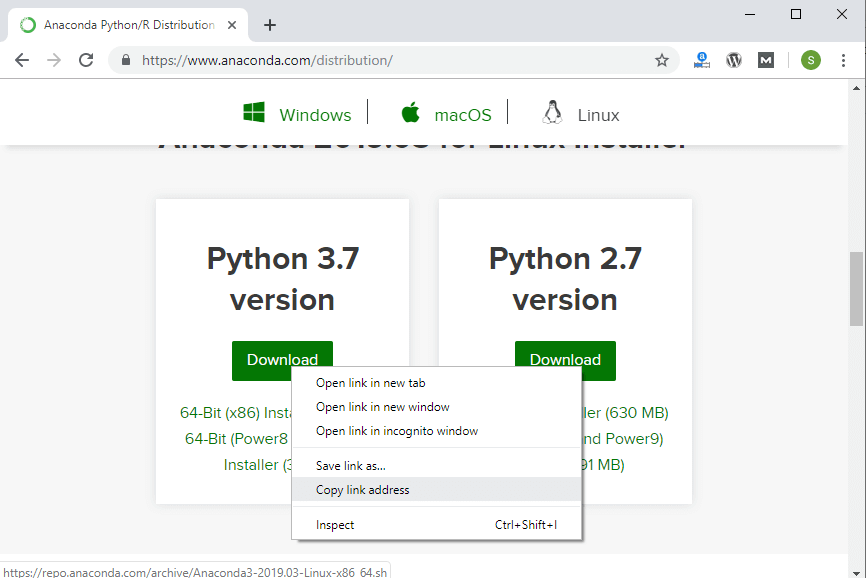
Your first step is to download Anaconda in your Linux operating system. To download it, you have to go through the following link https://www.anaconda.com/distribution/.

Step 2:
Here, you choose the latest version of python, i.e., 3.7 and click right button of the mouse and copy link address to install it.
Step 3:
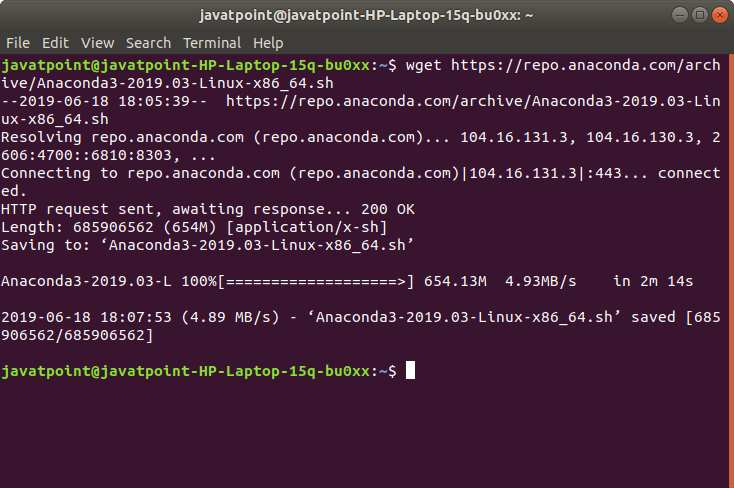
Open your terminal and run the copy link on the terminal using wget <link> command. This command download Anaconda in your Linux system.
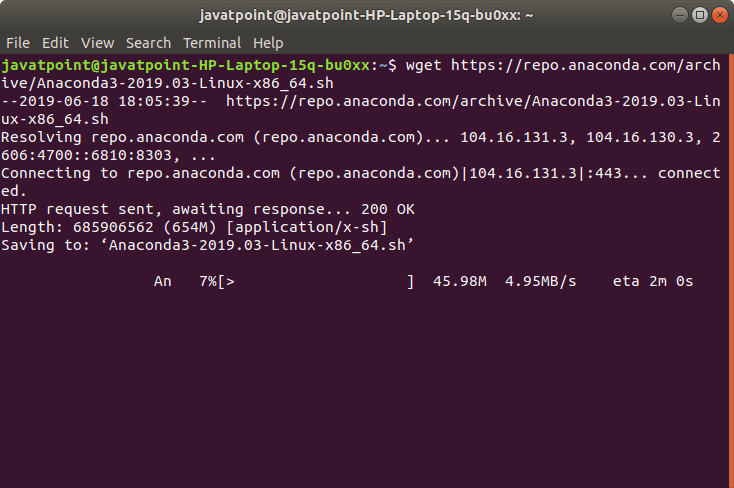
It takes a few seconds to download. Once downloading is complete your cursor go back to your home directory.
Step 4:
Next step is to install Anaconda in your system. To install it, you have to first enter in downloads directory or where you have downloaded your anaconda. Installation is done with bash file because in Linux when you download Anaconda, It downloaded as bash file. So, to install Anaconda, you have to run the bash ~/Downloads/Anaconda3-2019.03-Linux-x86_64.sh command for the latest version of python 3.7 or to run the bash ~/Downloads/Anaconda2-2019.03-Linux-x86_64.sh command for python 2.7.
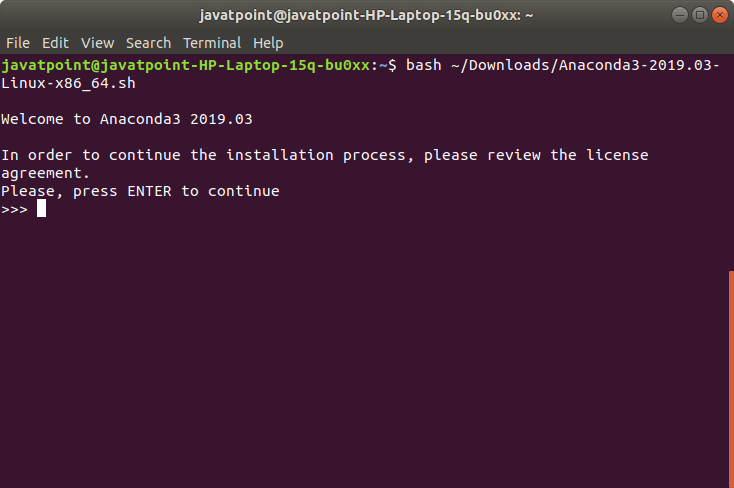
Here, you have to press the enter button to continue. When you press enter your installation is started. After a few installations it asks you one more question, i.e., Do you accept the license terms? You give it an answer by typing, yes.
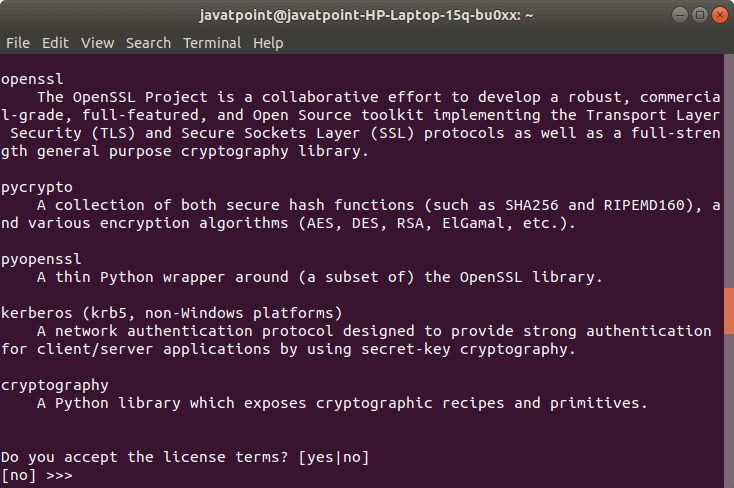
Step 5:
When you type yes and press enter, your installation of anaconda starts. After a few installations once again it asks you one last question, i.e., Do you wish the installer to initialize Anaconda3 by running conda init? You again type yes as an answer, and after that, your cursor comes back to downloads directory.
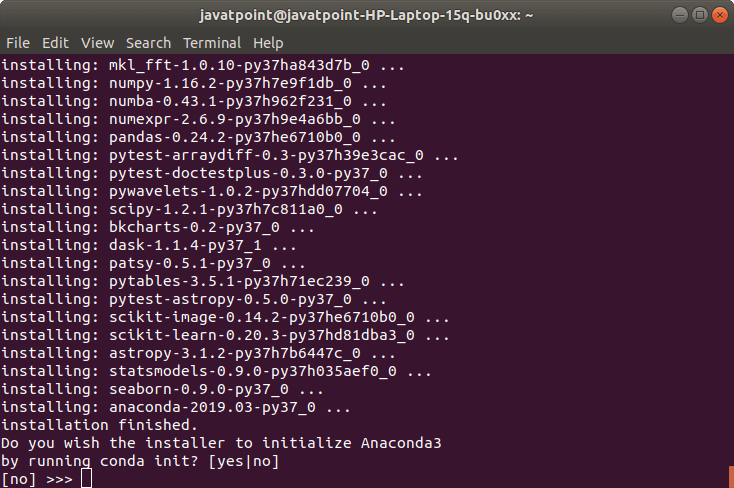
Step 6:
Now next step is to run source ~/.bashrc and anaconda-navigator and then we install the PyTorch.
Step 7:
Next step is to go to the official site of PyTorch using https://pytorch.org/ link.
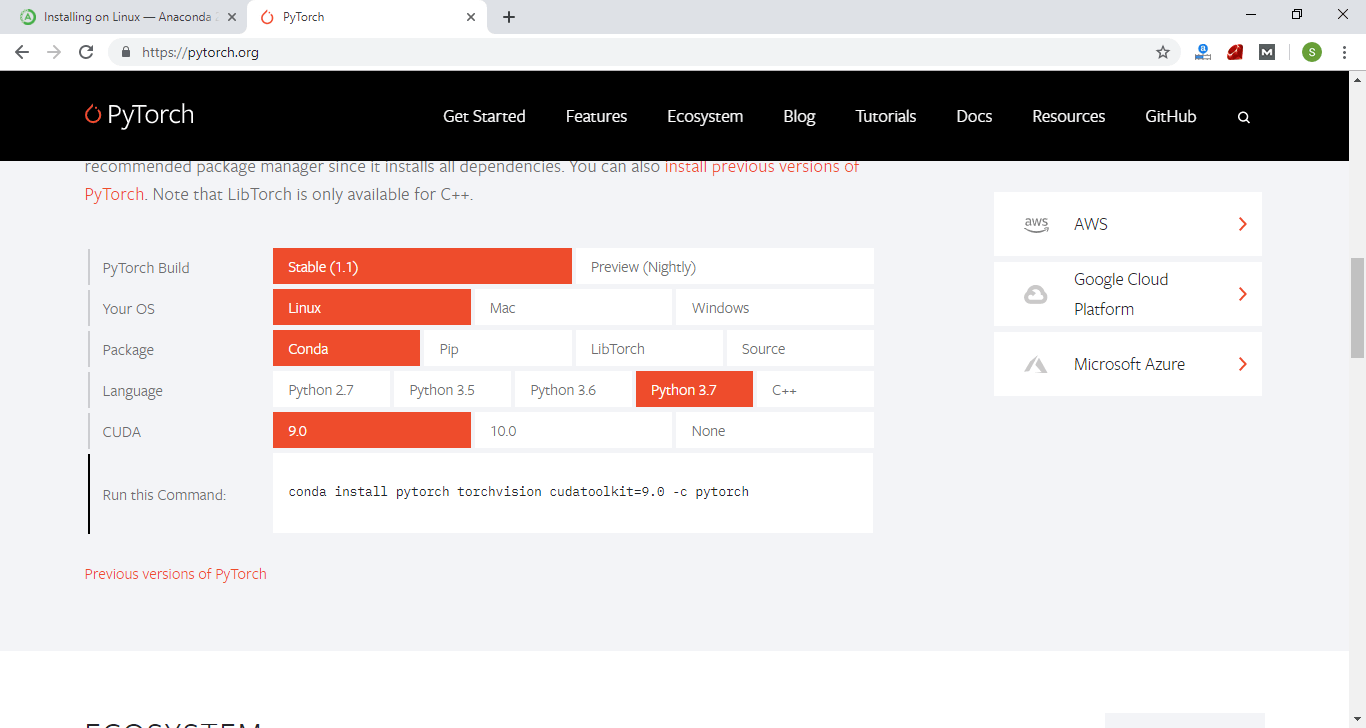
Here, you have to select your operating system, package, language, and CUDA version. I am using Conda package with python 3.7 and CUDA 9.0.
Step 8:
Now you have to run the command given by the official website on your terminal. Remember the command which you run is similar to the given command; otherwise, it will generate the error message with the unsuccessful installation.
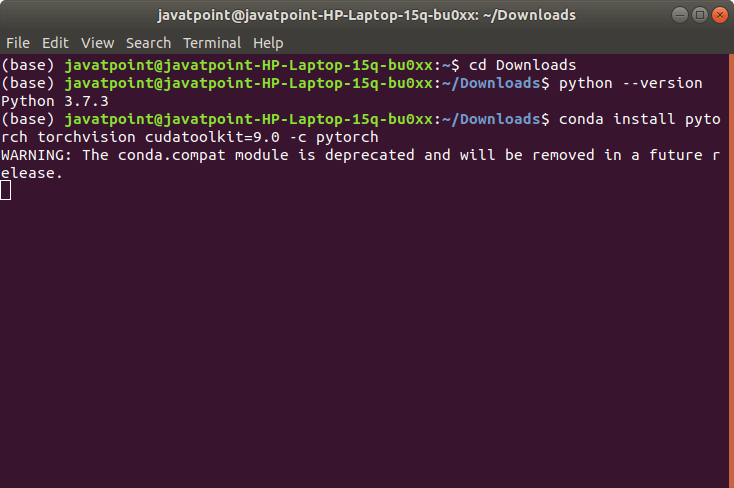
After a few seconds, it asks you to update packages if available. We have to give its answer by writing y.
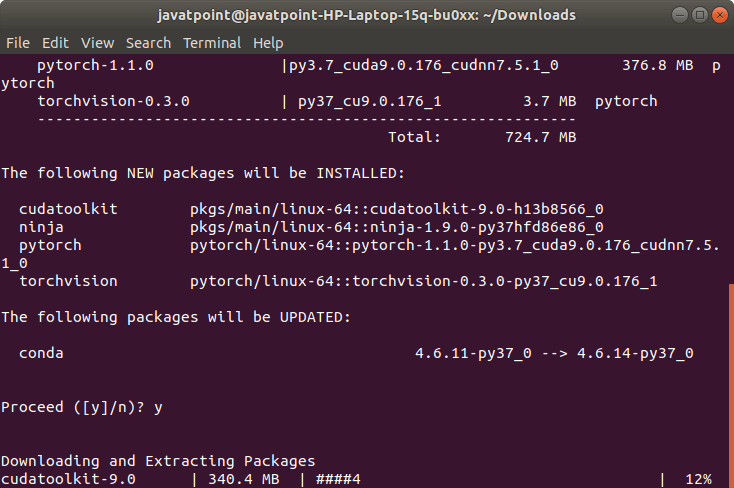
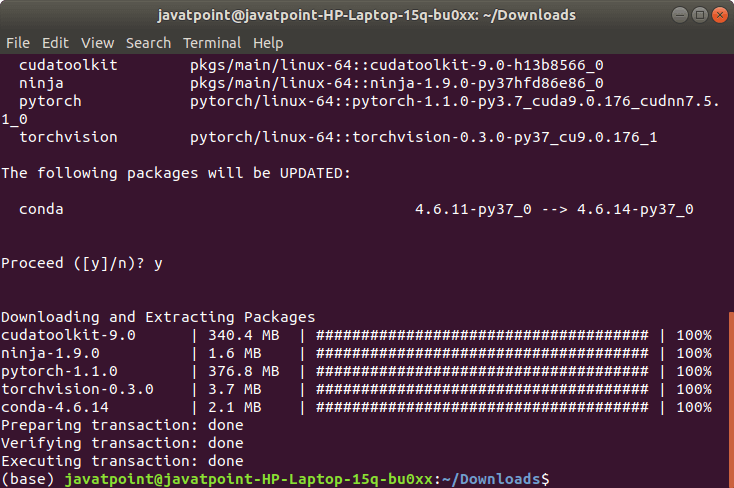
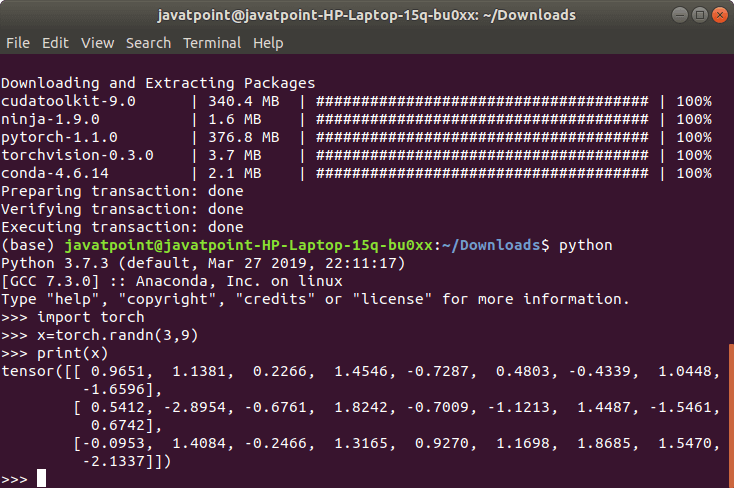
Once you give its answer, it starts downloading all packages such as PyTorch, Cudatoolkit, Conda, torch, etc.
Step 9:
Now, PyTorch installs successfully. It’s time to test PyTorch by executing torch program.
Leave a Reply