For comparison purposes, it will be valuable to see a server-side implementation of our registration use case. Again, we will have a registration form that allows users to opt-in to receive discounted or free movie tickets (see Figure 9–5).

Figure 9–5. Registration form for server-side POST with MVC
The page markup for our registration page is very similar to the one shown in our client-side example except we are not going to override the form submission process. In our server-side registration example, when the user clicks the Register button, we will let the form submit its request to our action (see Listing 9–10).
Listing 9–10. Registration form for server-side integration (/webapp/ch9/register-server.html)<div data-role="page" id="registrationPage" data-theme="d">
    <div data-role="header">
        <h1>Register</h1>
    </div>

    <div data-role="content">
     <form id="register" action="/jqm-webapp/mvc/register" method="post">
         <label for="email">Email:</label>
         <input type="email" name="email" id="email" placeholder="Email"
        required />

         <input type="submit" value="Register" data-theme="b"/>
     </form>
    </div>
</div>
Does anything standout when comparing the registration page from our client-side example (register-client.html) versus this one (register-server.html)? The most notable difference is this page requires no custom JavaScript. As a result, our page markup is much cleaner.
When the form is submitted, a POST request will be sent to the path defined in our action (/jqm-webapp/mvc/register). This request will be handled on the server-side by a Spring MVC12 controller that is deployed on Tomcat. In our web.xml file, we configured our servlet-mapping so all “/mvc/*” URL’s get routed through Spring MVC’s dispatcher servlet (see Listing 9–11).
Listing 9–11. Spring MVC servlet-mapping configuration (/WEB-INF/web.xml)<servlet>
<servlet-name>jqm-webapp</servlet-name>
<servlet-class>
org.springframework.web.servlet.DispatcherServlet
</servlet-class>
<load-on-startup>1</load-on-startup>
</servlet>
<servlet-mapping>
<servlet-name>jqm-webapp</servlet-name>
<url-pattern>/mvc/*</url-pattern>
</servlet-mapping>
From a user interface perspective, the workflow is identical to our client-side registration example. The form is submitted, processed, and then our thank you page is shown. The controller code that processes and redirects the request to the thank you page is shown in Listing 9–12.
__________
12 See http://static.springsource.org/spring/docs/current/spring-frameworkreference/html/mvc.html.
Listing 9–12. Spring MVC registration controller (com.bmb.jqm.controller.RegisterController.java)@Controller()
public class RegisterController {

    @RequestMapping(method = RequestMethod.POST)
    public String enroll(@RequestParam("email")String email, HttpSession
        session) {
        // Save registration...

        session.setAttribute("email", email);
        return "redirect:/mvc/register/thanks";
    }

    @RequestMapping(method = RequestMethod.GET)
    public String thanks() {
        return "register-thanks";
    }
}
Let’s review the Spring MVC annotations as we step through the controller:
- The
@Controllerannotation defines the class as a controller that can handle requests. Spring MVC was configured with path to class name mapping. For instance, all “/register/” requests will be dispatched to the RegisterController. This configuration was setup in Spring MVC’s dispatcher servlet (see Listing 9–13). - The
@RequestMappingannotation defines the methods that will handle the POST and GET requests. When the form is submitted, a POST request will be sent to theenrollmethod. Thethanksmethod will handle all GET requests. For instance, we redirect to the thank you page after the form is processed and thethanksmethod will get triggered when the thank you page is refreshed. - The
@RequestParamannotation will bind the email address that was submitted on the form to our email input parameter. When the enroll method is called, we save the registration, put the email address in session, and redirect to the thank you page (/jsp/register-thanks.jsp).
Listing 9–13. Spring MVC path to controller mapping configuration (/WEB-INF/jqm-webapp-servlet.xml)<!-- Enable controller mapping by convention. For example: /foo/* will map to
FooController() -->
<bean
class="org.springframework.web.servlet.mvc.support.ControllerClassNameHandlerMapping" />
The appearance of the thank you page will look identical to our client-side example (see Figure 9–6).
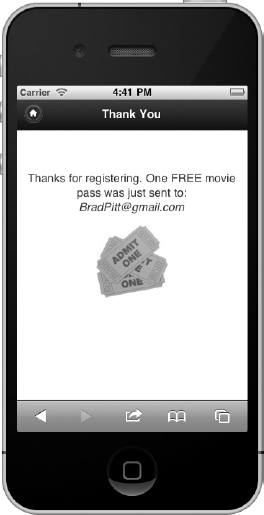
Figure 9–6. Thank you page after server-side POST with MVC
The only difference is in how the pages are generated. This page is generated on the server-side as a JSP and the email address is bound with JSTL expression syntax (see Listing 9–14). With no JavaScript necessary to dynamically generate the page this markup is cleaner compared to the dynamically generated thank you page we saw in the client-side example.
Listing 9–14. Thank you page after server-side registration (/jsp/register-thanks.jsp)<div data-role="page" id="thanksPage" data-theme="d">
    <div data-role="header">
        <h1>Thank You</h1>
    </div>

    <div data-role="content" class="thanks">
        <p>Thanks for registering.  One FREE movie pass was just sent to:
          <span class="email">${email}</span></p>
          <img src="images/free-movie.jpg">
    </div>
</div>
One important consideration to be aware of after submitting forms is that jQuery Mobile manages the URL that appears in the browser’s location bar. For instance, after the server redirects to “/mvc/register/thanks” the browser URL still shows the path of our action (“/jqm-webapp/mvc/register”). If you have not implemented a GET request handler for this path, a “refresh” on the thank you page will result in a 404, not found error. You have two options for handling this:
- The simplest solution is to implement a GET request handler on your controller for the action path. Our
RegisterController#thanksmethod handles GET requests and will simply refresh the thank you page and redisplay the email address stored in session (see Listing 9–12). Also, when submitting forms on the Web it is recommended to POST and then redirect to avoid any double-submit issues. - Alternatively, you may manually set the
data-urlattribute on the page container. The value of thedata-urlattribute will be shown in the browser’s location bar. This also gives developers more flexibility when constructing semantic paths:data-url="/manually/set/url/path/”This strategy can also be used to hide file names. For instance, if you forward to “/my/movies/index.html”, you may update thedata-urlattribute of the page to”/my/movies/”, which will hide the index.html part from displaying.
Leave a Reply