In this section, we are going to wrap a jQuery Mobile app with PhoneGap and run it on the native iOS platform. To set up PhoneGap for the iOS platform, we can reference PhoneGap’s “Getting Started Guide with iOS.”3 PhoneGap has step-by-step instructions for installing PhoneGap on every platform and their instructions are very detailed with screenshots for assistance. Installation of Xcode, the IDE for iOS development4 is a prerequisite for developing to the iOS platform. If you choose to bypass the Xcode installation it will still be valuable to follow along to familiarize yourself with the general steps that are necessary to set up PhoneGap on a native platform. While each platform has specific IDE setup instructions, the general process of installing PhoneGap, setting up the project, and deploying are consistent steps for all platforms. After your iOS platform is set up, you should have a new Xcode project that looks similar to Figure 10–1.
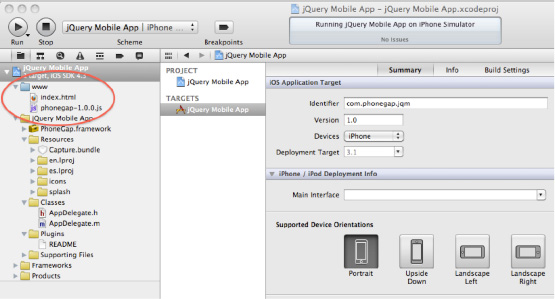
Figure 10–1. Initial Xcode project with PhoneGap support
The “www” directory shown in Figure 10–1 is the application root directory. Within this directory are the PhoneGap JavaScript library and a default page (index.html). The index.html page will be shown as the initial landing page when we run the app. In Xcode, to build and run the app, click the “Run” button that appears in Xcode’s upper left corner. After clicking “Run”, the app will compile, the iOS simulator will launch, and the index page will be shown (see Figure 10–2).
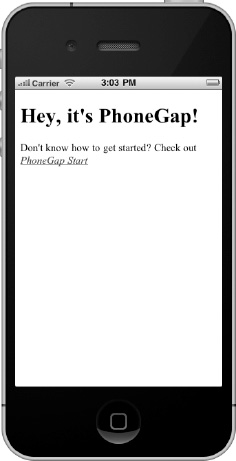
Figure 10–2. Initial screen when running PhoneGap’s default app in Xcode
With a PhoneGap project setup in Xcode we can now import an existing jQuery Mobile app into our project. The steps for importing a jQuery Mobile app into our Xcode project and deploying as a native iOS app are listed below:
- First, we need to import an existing jQuery Mobile project into Xcode’s “www” root directory. For this exercise, you may import your own jQuery Mobile app or import the jQuery Mobile project that is included in the chapter 10 source code folder. For example, if we import the jQuery Mobile files from the Chapter 10 source code directory and move them into our “www” directory, our Xcode project structure should appear as the figure below:

- After importing the jQuery Mobile project into our PhoneGap project we need to import PhoneGap’s JavaScript library as a top-level resource
<head>
  <meta charset="utf-8">
  <title>jMovies</title>
  <meta name="viewport" content="width=device-width, initial-scale=1">
  <link rel="stylesheet" type="text/css" href="jquery.mobile-min.css" />
  <link rel="stylesheet" type="text/css" href="custom.css" />
  <script type="text/javascript" src="phonegap-1.0.0.js"></script>
  <script type="text/javascript" src="jquery-min.js"></script>
  <script type="text/javascript" src="custom.js"></script>
  <script type="text/javascript" src="jquery.mobile-min.js"></script>
</head>- The PhoneGap library is an API that provides access to many device specific features (camera, media, storage, etc.). PhoneGap has documentation and examples of all their supported APIs on their website5. Importing the PhoneGap library is only necessary when your application needs to interact with PhoneGap’s native capabilities.
- The last step is to run and test our application. In Xcode, click the “Run” button. This will compile the app and launch it within the iOS simulator. If you imported the jQuery Mobile project from the chapter 10 source code the initial screen to appear will be the springboard (see Figure 10–3).
_____________________________
5See http://docs.phonegap.com/.
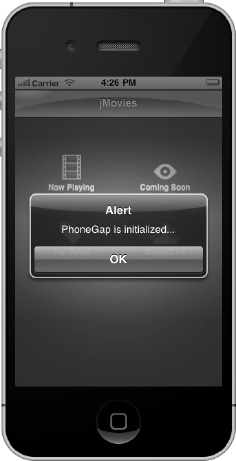
Figure 10–3. jQuery Mobile running as a native iOS app
To help validate that the PhoneGap library was properly installed I added a listener for PhoneGap’s device-ready event. When this event fires, PhoneGap is in a ready state and we may begin communicating with the PhoneGap API (see Listing 10–1).
Listing 10–1. PhoneGap is ready (ch10/custom.js)$(document).bind("deviceready", function(){
    navigator.notification.alert("PhoneGap is initialized...");
});
As shown in Figure 10–3, when PhoneGap is in a ready state we display an alert view indicating that PhoneGap has been initialized. The alert notification in Listing 10–1 is an example of how we can programmatically interact with PhoneGap’s API to access native functionality.
NOTE: PhoneGap has simplified the process of converting our jQuery Mobile web app to a native platform running on iOS. From a technical perspective, our jQuery Mobile web app is now running within an iOS Web View.
Do you see any differences when comparing our jQuery Mobile app running within a Safari browser (see Figure 10–4) versus the native app running in iOS (see Figure 10–5)?
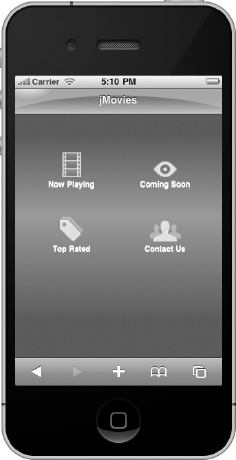
Figure 10–4. jQuery Mobile running within a browser
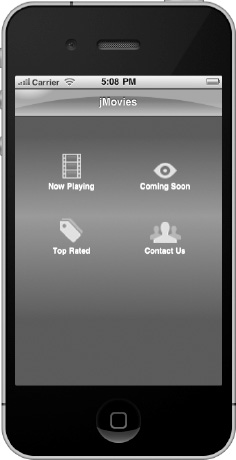
Figure 10–5. jQuery Mobile running as a native iOS app
The most obvious difference is that the browser chrome is available within the Safari browser, but not in the native app. If you recall our “Back Button” Section from Chapter 3, back buttons are initially disabled in jQuery Mobile because the browser chrome already provides build-in navigation buttons. However, for users running native iOS apps, the back button within the header is a primary means of navigation. Fortunately, we can enable back buttons in jQuery Mobile with a simple configuration update (see Listing 10–2).
Listing 10–2. Globally enable back buttons (ch10/custom.js)$(document).bind("mobileinit", function(){
    $.mobile.page.prototype.options.addBackBtn = true;
});
The back button in jQuery Mobile is very intelligent. It will only appear when there is a page in history to go back to. After enabling the back button globally our native iOS users will feel more comfortable when navigating the app (see Figure 10–6).
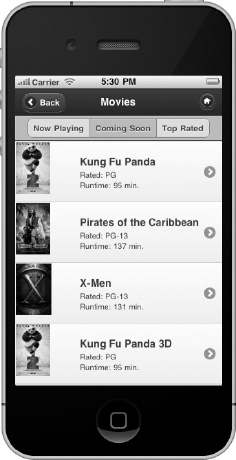
Figure 10–6. Globally enable back buttons for navigation support
With back buttons enabled globally we may also want to disable them on specific pages where they are not necessary. In particular, we will want to prevent the back button from appearing on the home screen. To prevent the back button from appearing on a given page, we can add the data-add-back-btn=”false” attribute to the page container:
<div data-role="page" id="home" data-add-back-btn="false">As a result, when we navigate back to our home screen the back button will not be shown.
Now that we are capable of deploying our jQuery Mobile app to the native iOS platform we will also want to customize the default app icon (see Figure 10–7) and splash screen (see Figure 10–8).
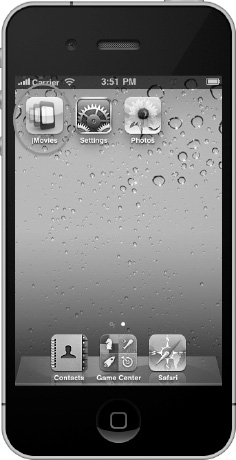
Figure 10–7. PhoneGap’s default app icon in iOS
Figure 10–8. PhoneGap’s default splash screen in iOS
App icons are stored in the project’s /Resources/icons directory and splash screen images are stored in the /Resources/splash directory (see Figure 10–9). Images are available for different iOS screen densities and sizes.
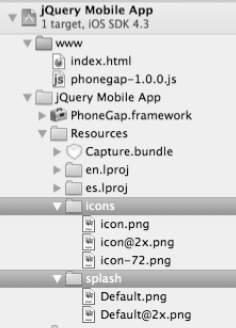
Figure 10–9. Xcode’s images for splash screen and app icons
Also, when you need to change the bundle display name or identifier, those can be set in Xcode in the project’s info tab (see Figure 10–10). The bundle display name sets the label for the app icon and the bundle identifier is used by iOS to uniquely identify your application.
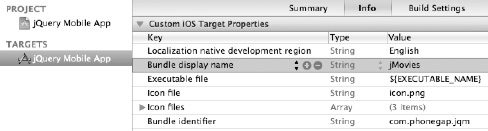
Figure 10–10. Setting bundle display name and identifier
TIP: When developing with PhoneGap, it is recommended to set the $.mobile.allowCrossDomainPages configuration option to true:
$(document).bind(“mobileinit”, function(){
    $.mobile.allowCrossDomainPages = true;
});
Phone Gap’s web view allows applications to make cross-domain calls. This is usually allowed so the application can fetch data from their home server. By default, jQuery Mobile will treat cross-domain requests as external links. As a result, the cross-domain page will not be loaded into the DOM of the current page and no transitions will be applied. Therefore, if you want to allow jQuery Mobile to manage the page loading logic of cross-domain requests in PhoneGap, set this option to true.
That completes the entire process from installing PhoneGap to running our jQuery Mobile app on the native iOS platform. After your app is production ready, the final step is distributing your iOS app to Apple’s App Store. Although the process can be lengthy, the complete instructions for distributing your app to Apple’s App Store can be found in Apple’s iOS developer library6.
Leave a Reply