It is essential to understand all the basic concepts which are required to work with PyTorch. PyTorch is completely based on Tensors. Tensor has operations to perform. Apart from these, there are lots of other concepts which are required to perform the task.

Now, understand all the concepts one by one to gain deep knowledge of PyTorch.
Matrices or Tensors
Tensors are the key components of Pytorch. We can say PyTorch is completely based on the Tensors. In mathematical term, a rectangular array of number is called a metrics. In the Numpy library, these metrics called ndaaray. In PyTorch, it is known as Tensor. A Tensor is an n-dimensional data container. For example, In PyTorch, 1d-Tensor is a vector, 2d-Tensor is a metrics, 3d- Tensor is a cube, and 4d-Tensor is a cube vector.
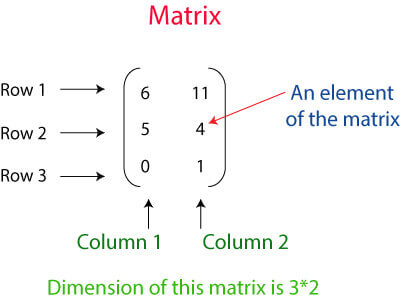
Above matrics represent 2D-Tensor with three rows and two columns.
There are three ways to create Tensor. Each one has a different way to create Tensor. Tensors are created as:
- Create PyTorch Tensor an array
- Create a Tensor with all ones and random number
- Create Tensor from numpy array
Let see how Tensors are created
Create a PyTorch Tensor as an array
In this, you have first to define the array and then pass that array in your Tensor method of the torch as an argument.
For example
- import torch
- arr = [[3, 4], [8, 5]]
- pyTensor = torch.Tensor(arr)
- print(pyTensor)
Output:tensor ([[3., 4.],[8., 5.]])

Create a Tensor with the random number and all one
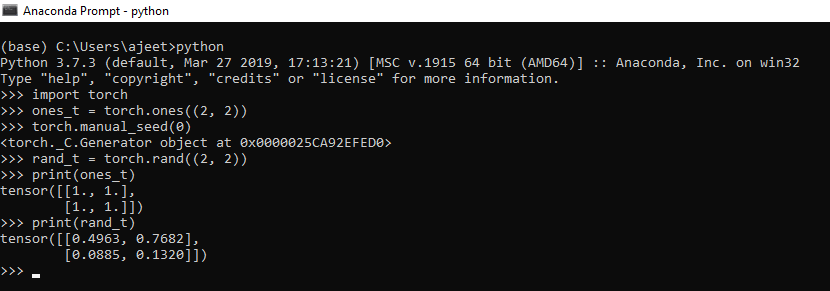
To create a random number Tensor, you have to use rand() method and to create a Tensor with all ones you have to use ones() of the torch. To generate random number one more method of the torch will be used with the rand, i.e., manual_seed with 0 parameters.
For example
import torch

ones_t = torch.ones((2, 2))

torch.manual_seed(0)  //to have same values for random generation

rand_t = torch.rand((2, 2))

print(ones_t)

print(rand_t)Output:Tensor ([[1., 1.],[1., 1.]]) tensor ([[0.4963, 0.7682],[0.0885, 0.1320]])
Create a Tensor from numpy array
To create a Tensor from the numpy array, we have to create a numpy array. Once your numpy array is created, we have to pass it in from_numpy() as an argument. This method converts the numpy array to Tensor.
For example
- import torch
- import numpy as np1
- numpy_arr = np1.ones((2, 2))
- pyTensor = torch.from_numpy(numpy_arr)
- np1_arr_from_Tensor = pyTensor.numpy()
- print(np1_arr_from_Tensor)
Output:[[1. 1.] [1. 1.]]

Tensors Operations
Tensors are similar to an array, so all the operation which we are performing on an array can also apply for Tensor.
1) Resizing a Tensor
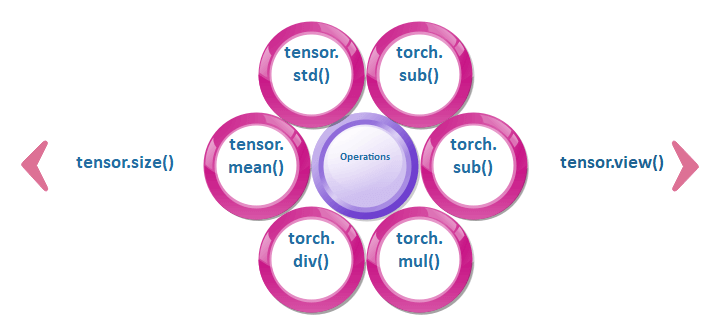
We can resize the Tensor using the size property of Tensor. We use Tensor.view() for resizing a Tensor. Resizing a Tensor means the conversion of 2*2 dimensional Tensor to 4*1 or 4*4 dimensional Tensor to 16*1 and so on. To print the Tensor size, we use Tensor.size() method.
Let see an example of resizing a Tensor.
import torch

pyt_Tensor = torch.ones((2, 2))

print(pyt_Tensor.size())        # shows the size of this Tensor

pyt_Tensor = pyt_Tensor.view(4) # resizing 2x2 Tensor to 4x1

print(pyt_Tensor)Output:torch.Size ([2, 2]) tensor ([1., 1., 1., 1.])

2) Mathematical Operations
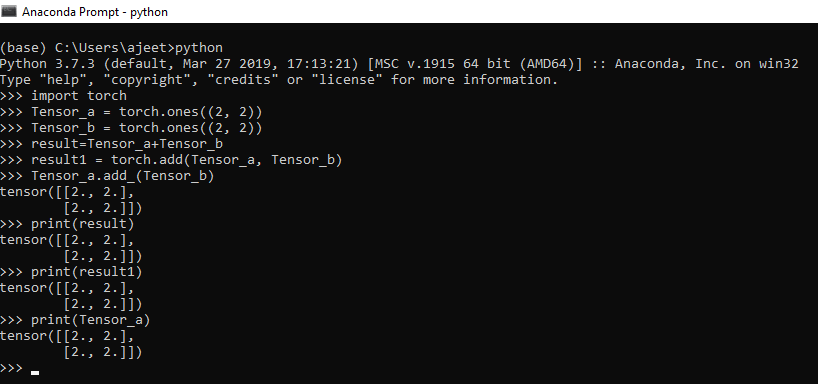
All the mathematical operation such as addition, subtraction, division, and multiplication can be performed on Tensor. The torch can do the mathematical operation. We use a torch.add(), torch.sub(), torch.mul() and torch.div() to perform operations on Tensors.
Let see an example how mathematical operations are performed:
import numpy as np

import torch

Tensor_a = torch.ones((2, 2))

Tensor_b = torch.ones((2, 2))

result=Tensor_a+Tensor_b

result1 = torch.add(Tensor_a, Tensor_b)     //another way of addidtion

Tensor_a.add_(Tensor_b) // In-place addition

print(result)

print(result1)

print(Tensor_a)
Output:
3) Mean and Standard deviation
We can calculate the standard deviation of Tensor either for one dimensional or multi-dimensional. In our mathematical calculation, we have first to calculate mean, and then we apply the following formula on the given data with mean.

But in Tensor, we can use Tensor.mean() and Tensor.std() to find the deviation and mean of the given Tensor.
Let see an example of how it performed.
import torch

pyTensor = torch.Tensor([1, 2, 3, 4, 5])

mean = pyt_Tensor.mean(dim=0)        //if multiple rows then dim = 1

std_dev = pyTensor.std(dim=0)       // if multiple rows then dim = 1

print(mean)

print(std_dev)Output:tensor (3.) tensor (1.5811)

Variables and Gradient
The central class of the package is autograd.variable. Its main task is to wrap a Tensor. It supports nearly all of the operations defined on it. You can call .backword() and have all the gradient computed only when you finish your computation.
Through .data attribute, you can access the row Tensor, while the gradient for this variable is accumulated into .grad.
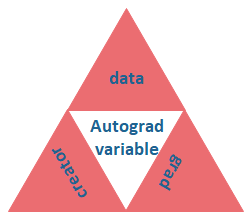
In Deep learning, gradient calculation is the key point. Variables are used to calculate the gradient in PyTorch. In simple words, variables are just a wrapper around Tensors with gradient calculation functionality.
Below is the python code which is used to manage variables.
import numpy as np


import torch


from torch.autograd import Variable


pyt_var = Variable(torch.ones((2, 2)), requires_grad = True)
Above code behaves the same as Tensors, so that we can apply all operations in the same way.

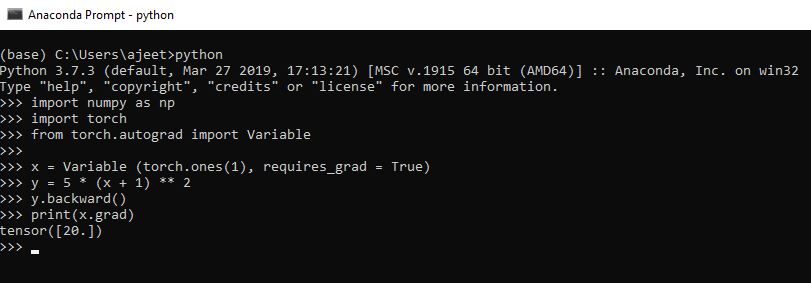
Let see how we can calculate the gradient in PyTorch.
Example
import numpy as np

import torch

from torch.autograd import Variable

// let's consider the following equation

// y = 5(x + 1)^2

x = Variable (torch.ones(1), requires_grad = True)

y = 5 * (x + 1) ** 2        //implementing the equation.

y.backward()                // calculate gradient

print(x.grad)                // get the gradient of variable x

# differentiating the above mentioned equation

// => 5(x + 1)^2 = 10(x + 1) = 10(2) = 20Output:tensor([20.])
Leave a Reply