Generally, we sign up in any website, it sends the confirmation link to activate the account. Or sometime it asks to email to change the email or reset the password of an account.
In this tutorial, we will learn how to send the confirmation mail using the Django when someone registers on our web app. We will discuss an easy way to build this. But Django provides many other options like django allauth application, django-registration, django-registration-redux. Those applications make this task very straightforward.
Before starting, make sure that you must knowledge of Django and Python programming language. Create the basic setup of Django and configure the settings.
Configure Settings
First we need to configure the email host server in the settings.py for confirmation mail. Add the below configuration in the settings.py file.
EMAIL_USE_TLS = True

EMAIL_HOST = 'smtp.gmail.com'

EMAIL_HOST_USER = '[email protected]'

EMAIL_HOST_PASSWORD = 'yourpassword'

EMAIL_PORT = 587
We used the email-id along with the password and gmail SMTP host server. You can use the other SMTP server as well.
Generate Token
We need to create the token that will be used in email confirmation URL. Create the token.py file in the token and add the below code.
- from django.contrib.auth.tokens import PasswordResetTokenGenerator
- from django.utils import six
- class TokenGenerator(PasswordResetTokenGenerator):
- def _make_hash_value(self, user, timestamp):
- return (
- six.text_type(user.pk) + six.text_type(timestamp) +
- six.text_type(user.is_active)
- )
- account_activation_token = TokenGenerator()
We used the PasswordTokenGenerator class that is used to reset the password. In the above code, we generated the unique token for confirmation.
Create Registration Form
Django provides the built-in UserCreationForm which is an excellent class to create form. We create a forms.py file in the app and import the UserCreationForm class. Let’s understand the following code.
forms.py
from django import forms

from django.contrib.auth.forms import UserCreationForm

from django.contrib.auth.models import User


class SignupForm(UserCreationForm):

    email = forms.EmailField(max_length=200, help_text='Required')

    class Meta:

        model = User

        fields = ('username', 'email', 'password1', 'password2')
In the above code, we imported the UserCreationForm and built-in User. Then we created a SignupForm including extra field email in SignupForm.
view.py
from django.http import HttpResponse

from django.shortcuts import render, redirect

from django.contrib.auth import login, authenticate

from .forms import SignupForm

from django.contrib.sites.shortcuts import get_current_site

from django.utils.encoding import force_bytes, force_text

from django.utils.http import urlsafe_base64_encode, urlsafe_base64_decode

from django.template.loader import render_to_string

from .tokens import account_activation_token

from django.contrib.auth.models import User

from django.core.mail import EmailMessage


def signup(request):

    if request.method == 'POST':

        form = SignupForm(request.POST)

        if form.is_valid():

            # save form in the memory not in database

            user = form.save(commit=False)

            user.is_active = False

            user.save()

            # to get the domain of the current site

            current_site = get_current_site(request)

            mail_subject = 'Activation link has been sent to your email id'

            message = render_to_string('acc_active_email.html', {

                'user': user,

                'domain': current_site.domain,

                'uid':urlsafe_base64_encode(force_bytes(user.pk)),

                'token':account_activation_token.make_token(user),

            })

            to_email = form.cleaned_data.get('email')

            email = EmailMessage(

                        mail_subject, message, to=[to_email]

            )

            email.send()

            return HttpResponse('Please confirm your email address to complete the registration')

    else:

        form = SignupForm()

    return render(request, 'signup.html', {'form': form})
Here we create a view of sign up, it got information using POST method and valid it. We have used the commit = False because it allows us to get the model object and add some extra attribute. Here we have done user.is_active = False which means user cannot login until email is verified.
Then we used the EmailMessage() function to send mail along with the subject, message. Email message create by a template.
templates/acc_active_email.html
- {% autoescape off %}
- Hi {{ user.username }},
- Please click on the link to confirm your registration,
- http://{{ domain }}{% url 'activate' uidb64=uid token=token %}
- {% endautoescape %}
This template create an email body with activate link that will send for application.
Now we need to create a view for the activation link.
Create Activation View
Once the user click on the activation link, we need to activate their account through activation link. This process is handled by the activate view.
views.py
- def activate(request, uidb64, token):
- User = get_user_model()
- try:
- uid = force_text(urlsafe_base64_decode(uidb64))
- user = User.objects.get(pk=uid)
- except(TypeError, ValueError, OverflowError, User.DoesNotExist):
- user = None
- if user is not None and account_activation_token.check_token(user, token):
- user.is_active = True
- user.save()
- return HttpResponse('Thank you for your email confirmation. Now you can login your account.')
- else:
- return HttpResponse('Activation link is invalid!')
We have added the activate function after the signup function. This view will check token it valid then user will activate and login. We set user.is_active = True which means user can login.
Now we will map the views to the urls.
URLS
- from django.urls import path
- from .views import home, index, activate
- urlpatterns = [
- path('', home, name = 'home'),
- path('form/', index, name = 'index'),
- path('activate/(?P<uidb64>[0-9A-Za-z_\-]+)/(?P<token>[0-9A-Za-z]{1,13}-[0-9A-Za-z]{1,20})/',
- activate, name='activate'),
- ]
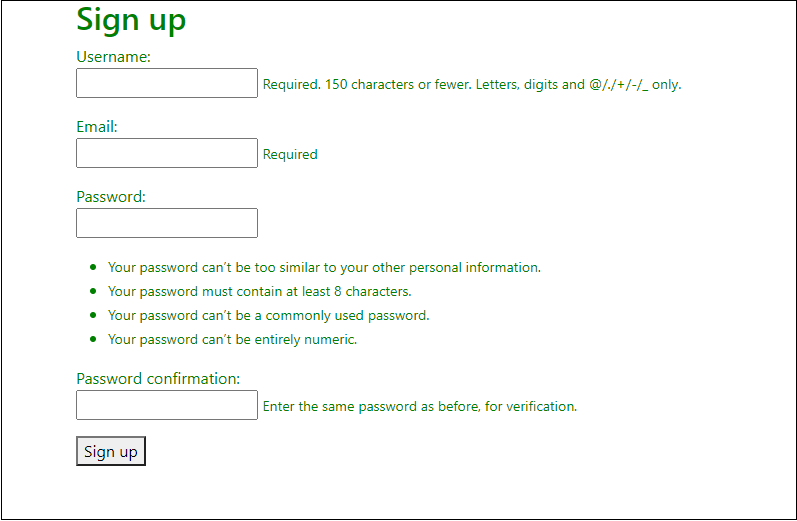
Create a sign up form in template/signup.html.
{% extends 'base.html' %}


{% block content %}

<div class = "container">

  <h2>Sign up</h2>

  <form method="post">

    {% csrf_token %}

      {% for field in form %}

      <p>

        {{ field.label_tag }}<br>

        {{ field }}

        {% if field.help_text %}

          <small style="display: none ">{{ field.help_text }}</small>

        {% endif %}

        {% for error in field.errors %}

          <p style="color: red">{{ error }}</p>

        {% endfor %}

      </p>

      {% endfor %}

    <button type="submit">Sign up</button>

  </form>

</div>

{% endblock %}
The form will look like as below. When the user click on the submit button the activation link send their entered email id.
When you click on the sign up button, the confirmation email send on given email-id.
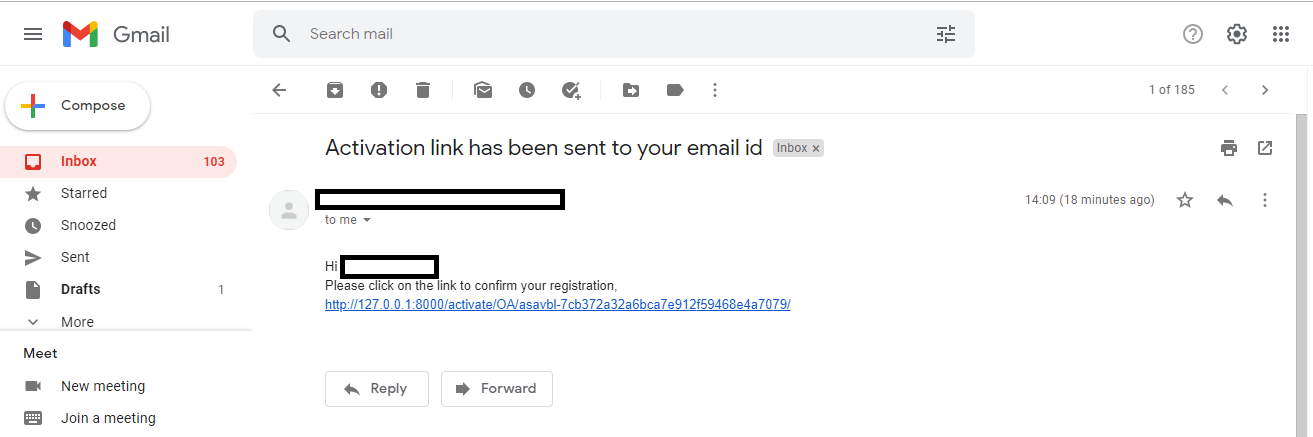
Click on the received link and now you are ready to login.
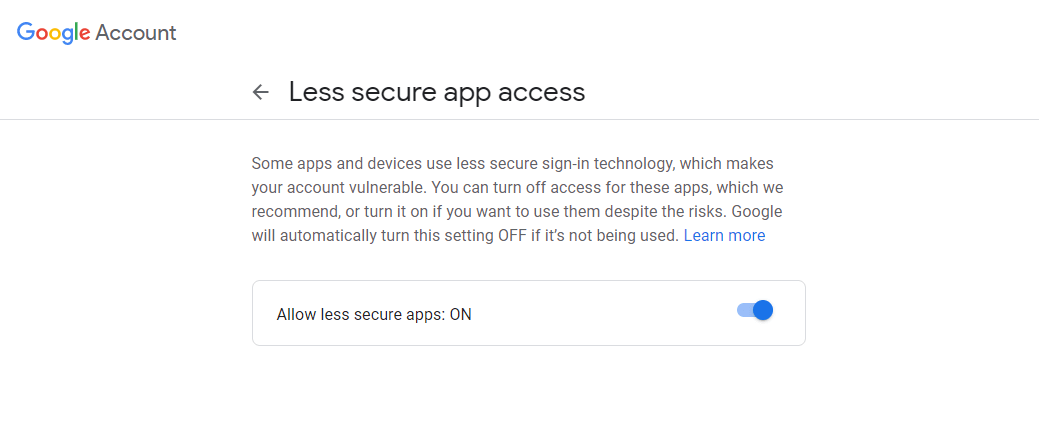
Note -Make sure that the less secure app access setting should be turned on. Otherwise, you will face smtp error.
Tada, we have successfully created an email configuration based user registration. This process is straightforward and required less code to complete. You can make it more improvement by adding more functionality such as attractive template, redirect to login, etc.
Leave a Reply