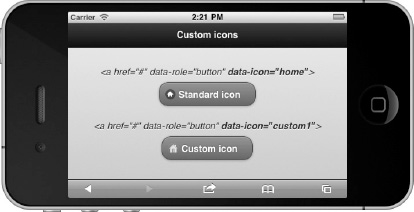
Remember when we added custom Glyphish icons to our tab bar back in Figure 3-13? We can integrate buttons with custom icons in the same manner (see Figure 4–7).

Figure 4–7. Custom icons
However, with buttons we can apply a more simplified solution as shown in Listing 4–7. Two steps are necessary to add custom icons to your buttons:
- Add a
data-iconattribute to the link. The value of this attribute must uniquely identify the custom icon. For example,data-icon=”my-custom-icon”.- Create a CSS class attribute that sets the background source for our custom image. The name of the class attribute must be named “.ui-icon-<data-icon-value>. For example, if our data-icon value was “
my-custom-icon”, our new CSS class attribute would be “.ui-icon-my-custom-icon”.
Listing 4–7. Custom icon integration (ch4/icon-buttons-custom.html)<style>
  .ui-icon-custom1 {
         background:url(data:image/png;base64,iVBORw0...)50% 50% no-repeat;
         background-size: 14px 14px;
  }
</style>
<a href="#" data-role="button" data-icon="custom1">Custom</a>
TIP: The background source for our custom image was loaded with the data URI scheme. This can be a performant alternative to loading small images externally. For instance, by including the custom image in-line we have eliminated an HTTP request. However, the main disadvantage of this technique is the size of the base64 encoded string is 1/3 times larger than the original image. To see the complete base64 encoded string refer to the source code listing in ch4/icon-buttons-custom.html.
Leave a Reply